
Not woodworking either. — But we build a firewall/router and put it into production…
This is a continuation of my previous post about revamping our home network.
The next step involved building a pfSense appliance that serves as a firewall to the internet and also controls traffic between the different VLANs.
The build had to meet the following criteria:
- fanless/no noise,
- small footprint,
- low power, since it will be running 24/7,
- able to route at gigabit wire speed or close to it,
- able to monitor bandwidth usage and handle multiple VLANs.
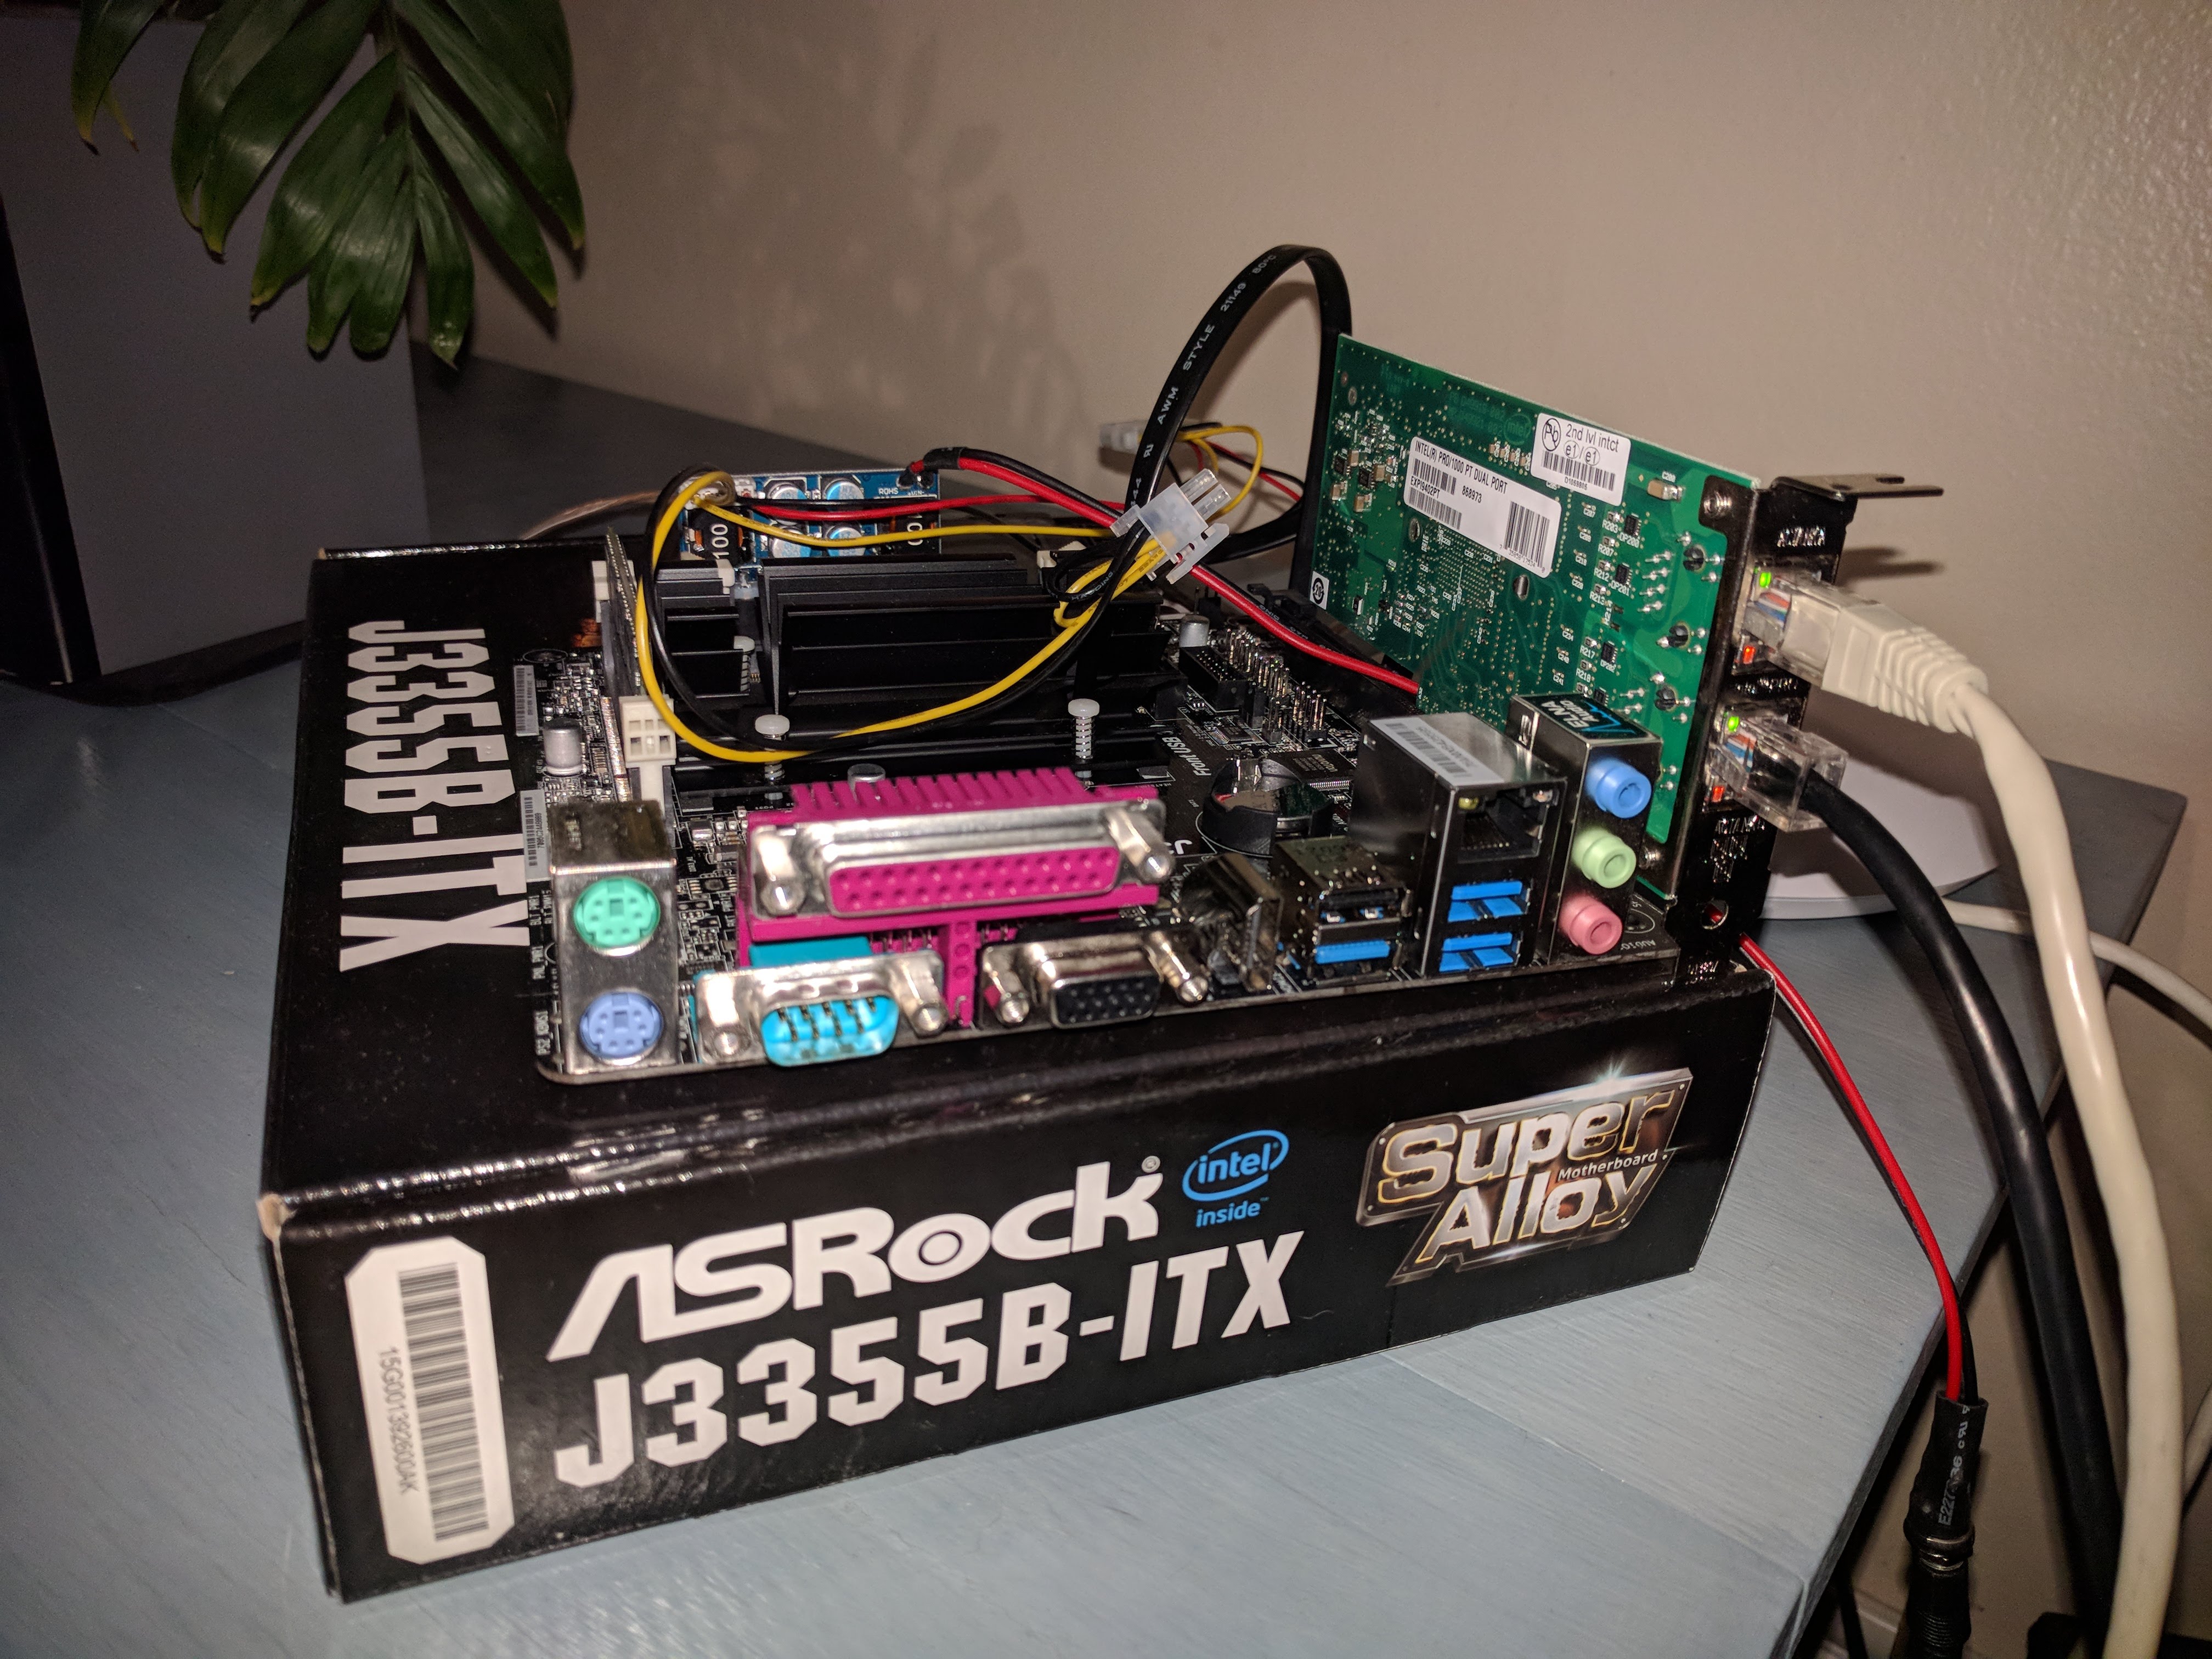
I ended up purchasing this mITX motherboard with a J3355 Celeron on board. The processor is passively cooled and has a max. power consumption of 10W. However, the motherboard has only a single ethernet port that is controlled by a Realtek chip which is generally not recommended for FreeBSD (and pfSense is based on FreeBSD).
Therefore the next step was to procure a dual port gigabit intel network card to plug into the motherboard’s PCIe expansion slot. These cards are readily available on eBay for far less than intel’s MSRP. I picked up a new intel EXPI9402PT card like this one with a low profile bracket on eBay for just under USD 30. While the card works fine, in retrospect the newer E1G42ET model (like this one) might have been a better choice: While the extra features it has don’t matter for my use case, the newer card has a lower power consumption and hence produces less heat. — In fact, unlike the older model that I got, it typically comes without a heat sink.
In order to be able to build a system as small and power efficient as possible I also opted for a Pico PSU. This is basically just a circuit board that plugs into the power connector of the motherboard, takes 12V DC as input and creates all the voltages needed to run the motherboard and maybe a hard disk/SSD.
I got a new Pico PSU that had received very favorable reviews similar to this one for a little under USD 20 off of eBay.
The following items were found in my “bin of random electronics parts that might come in handy in the future”:
- A 60GB Kingston SSDNow SSD,
- One stick of 8GB of DDR3 1333 204 pin SODIMM,
- A 12V/4A DC power brick (from some other electronics device that died). — Using a voltmeter I confirmed that its voltage without load was only about 12.35V and that it was “center positive”, so that it wouldn’t fry the Pico PSU.
Note that each of these items is overkill for the project. The build should never draw four amps, and 60GB is at least 20x the disk space that pfSense actually needs. 8GB of RAM is also plenty. But I had it on hand, and one oddity of the motherboard I purchased is that it does not support 2GB SODIMMs.
Lack of Decent mITX Cases
The most difficult part to source turned out to be the case for this build. I wanted something as small as possible, but your choices for mITX cases seem to come down to either getting something that
- just fits the motherboard and nothing else, or
- is large enough to hold a full size graphics card and an ATX power supply, or
- is outrageously expensive and would double my budget, or
- is eternally “out of stock”.
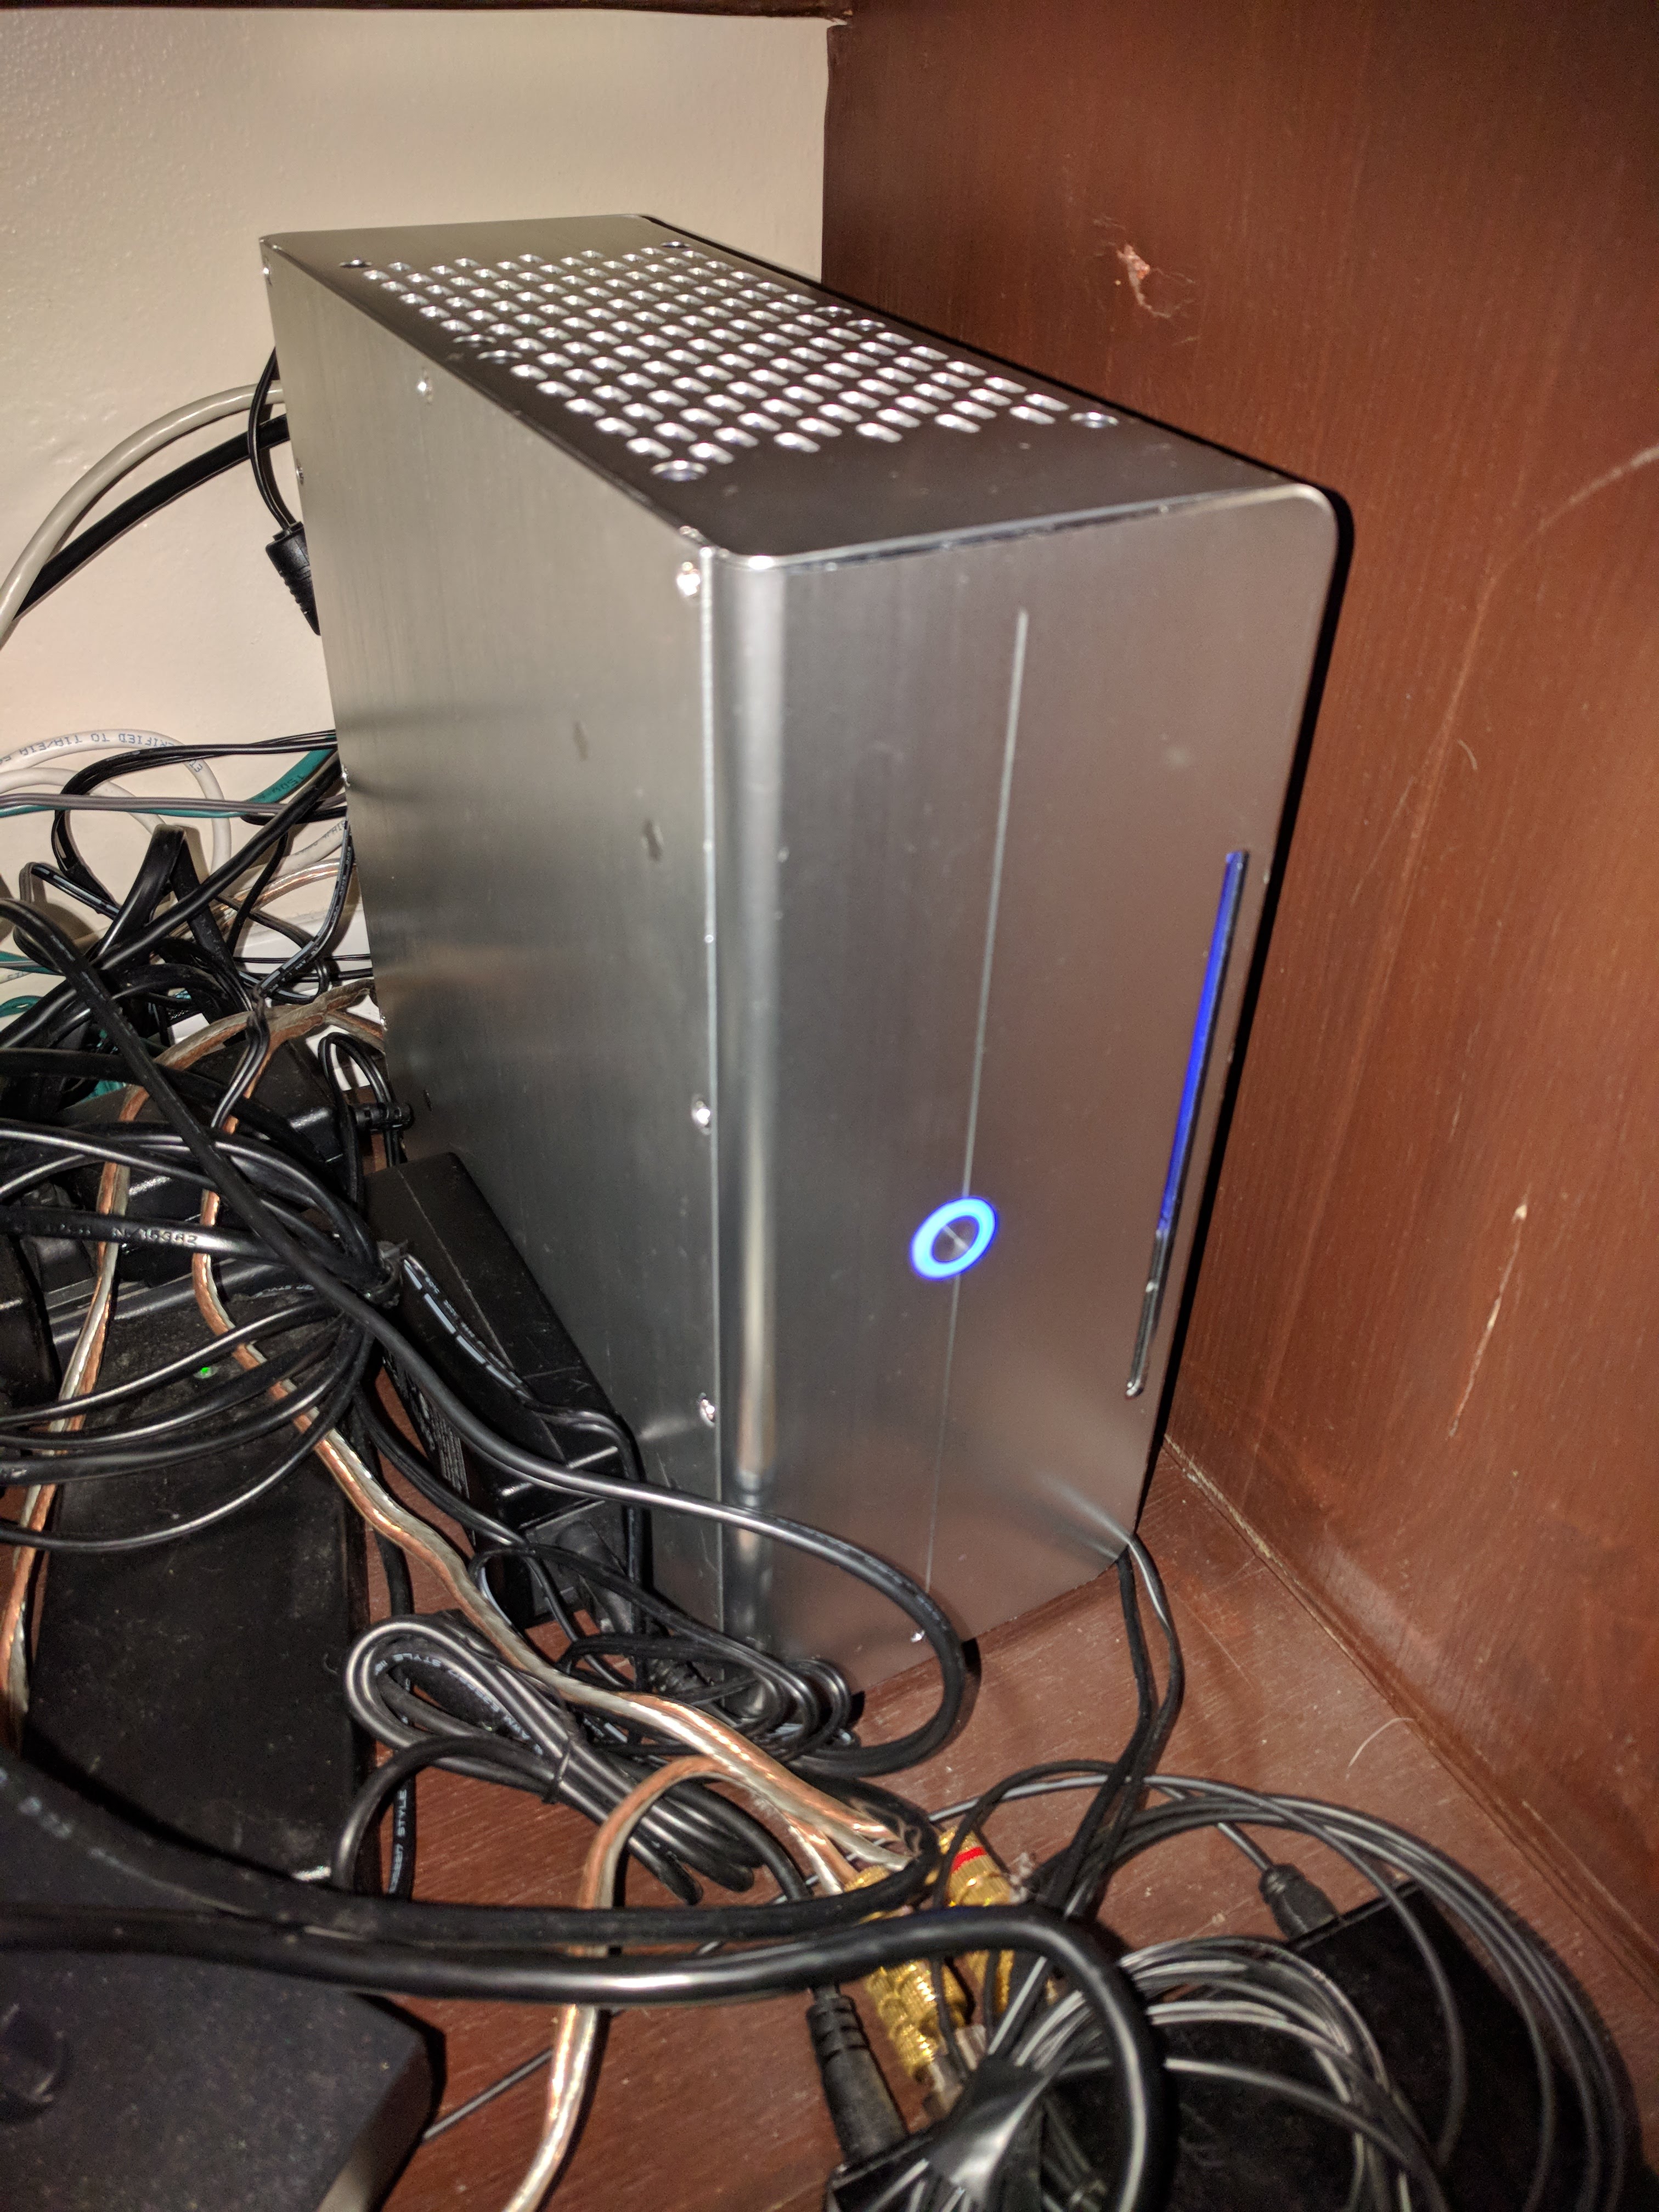
I ended up finding the Realan E-i7 case from a vendor in China. The aesthetics is a little “90ies HiFi” but it seems to be the only reasonably priced small mITX case that can fit a low profile PCIe card.
Building/Installing pfSense
Since the case was the part that took the longest to arrive, I had the firewall running like this for a while:
Finally the Realan case arrived:
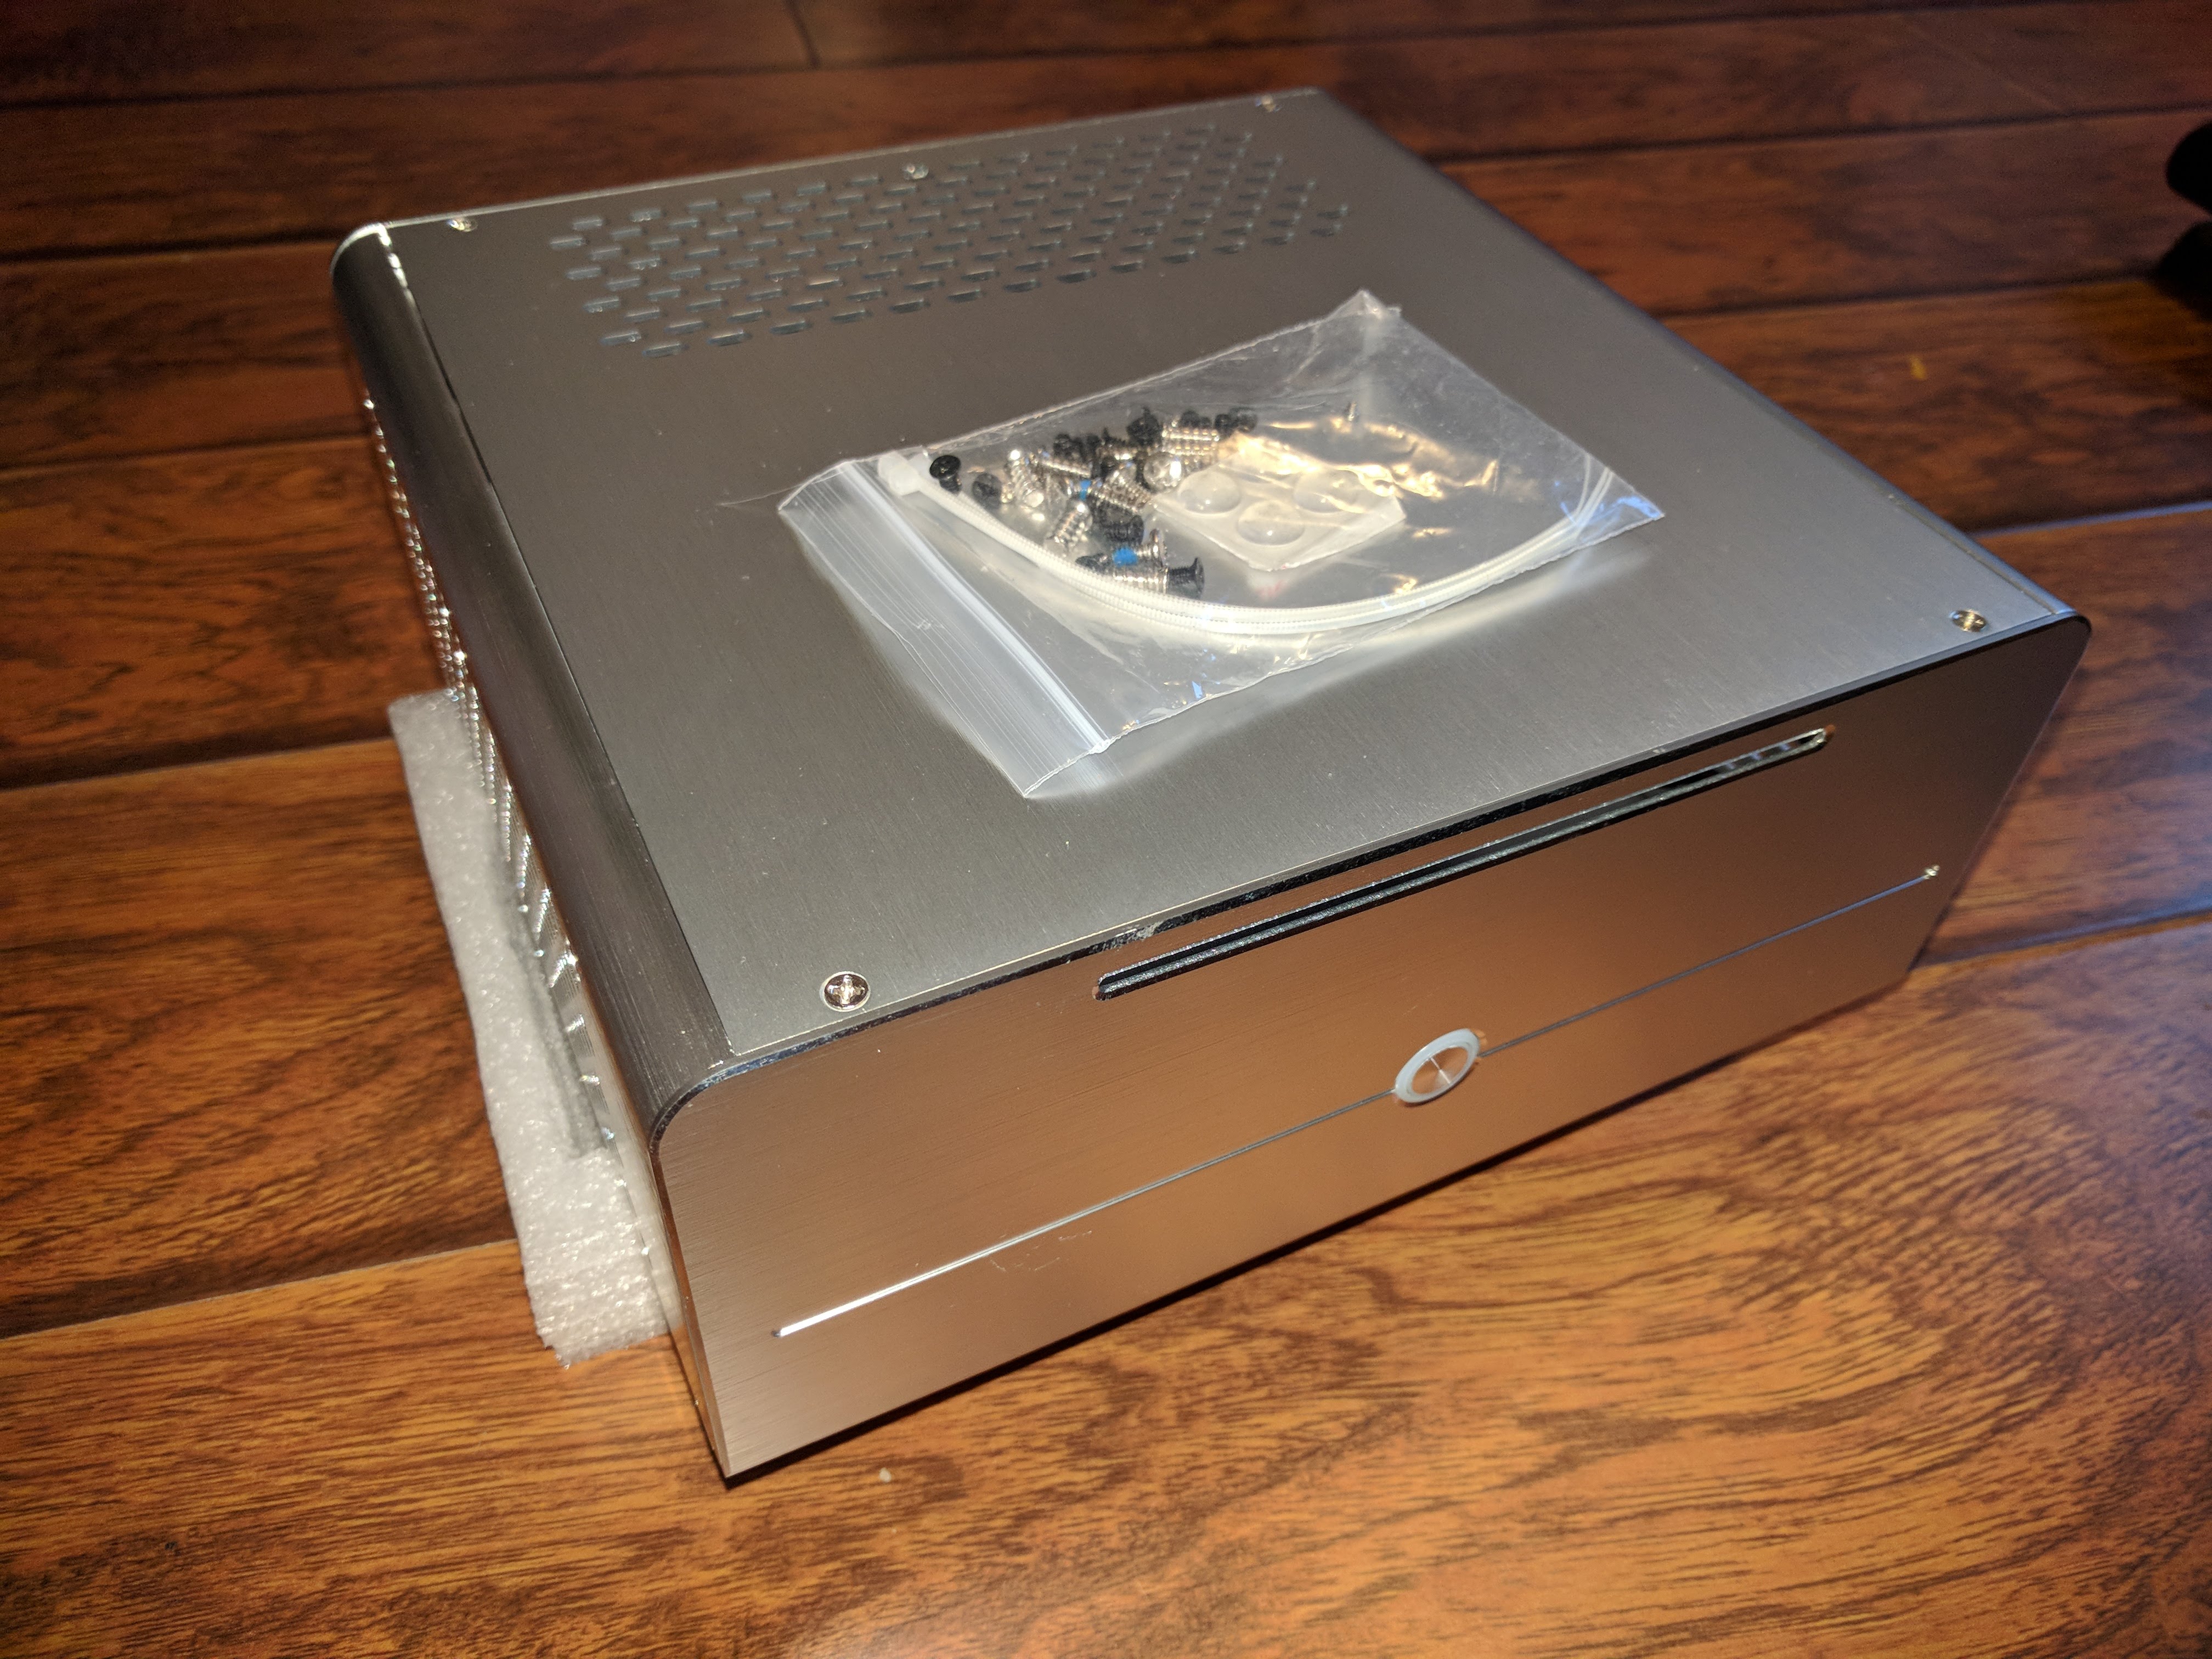
What is remarkable about this case is that it is entirely held together by screws. There is not a single rivet or weld anywhere.
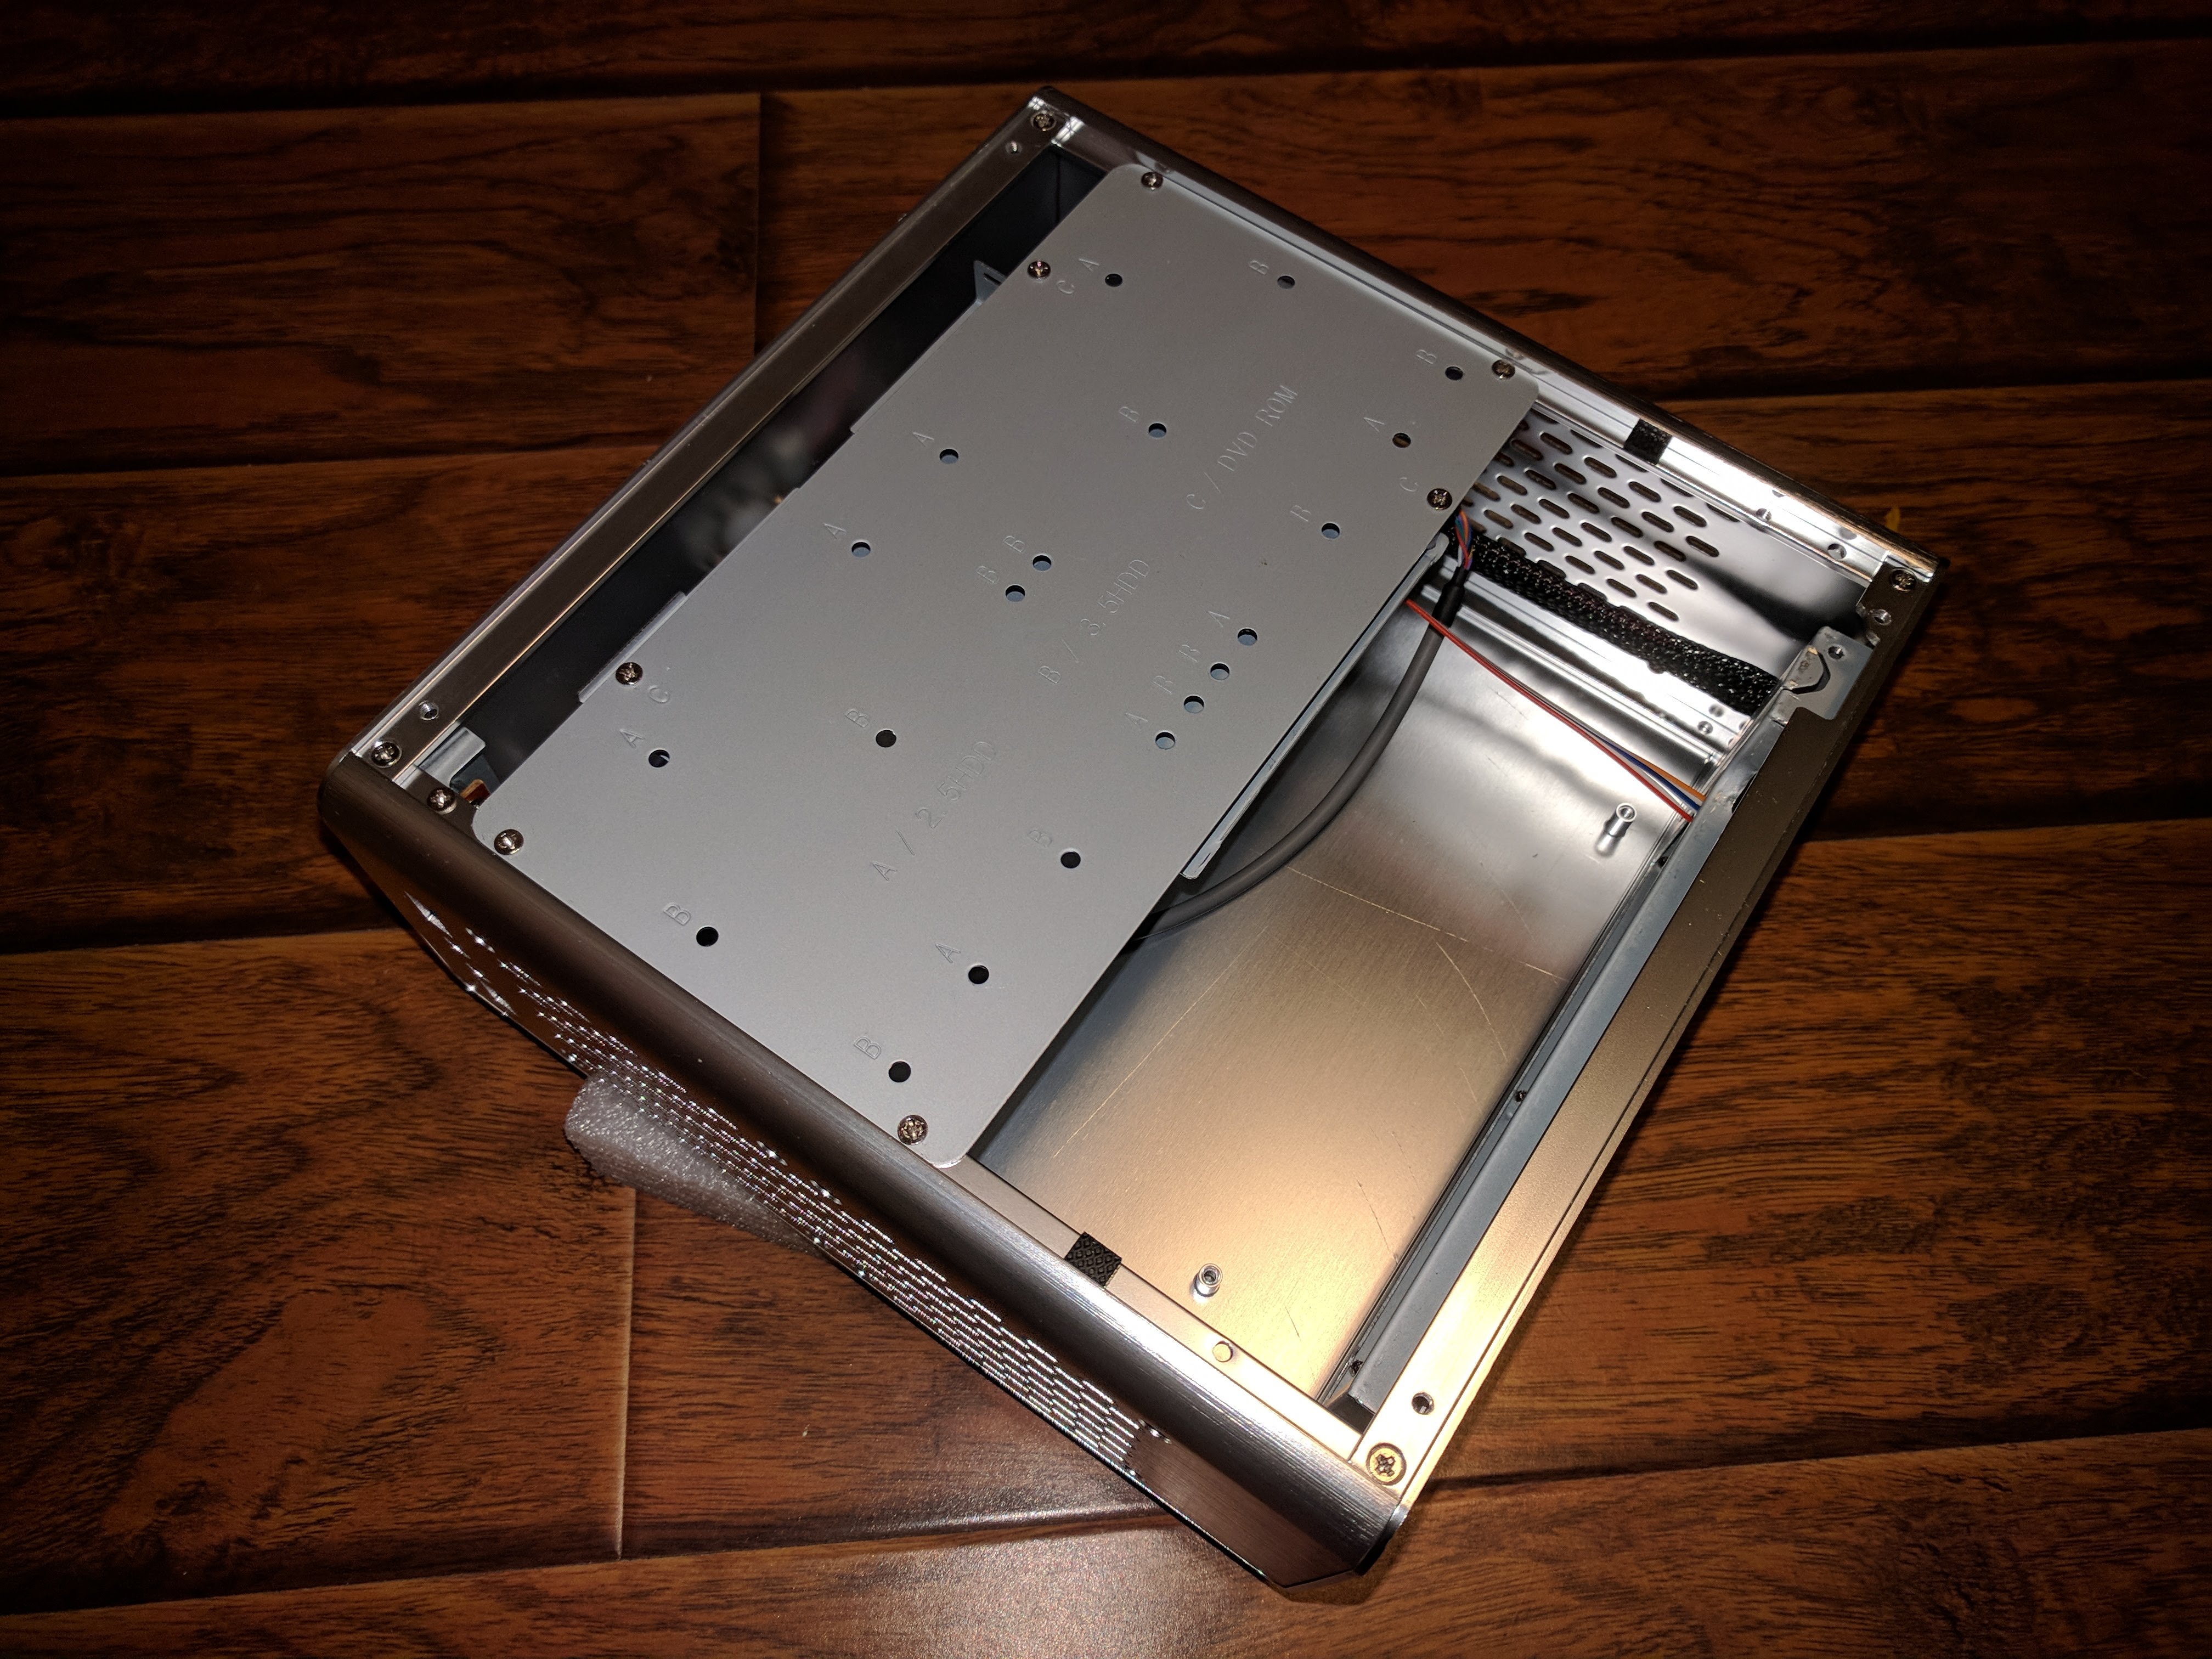
The tray you see in this picture allows for the installation of a slim DVD/BlueRay drive and a hard disk. And while the case is well designed such that the tray does not block any of the ventilation grilles, I was still concerned about cooling, since I wanted to run this as a fanless system. Therefore I decided to remove the tray:
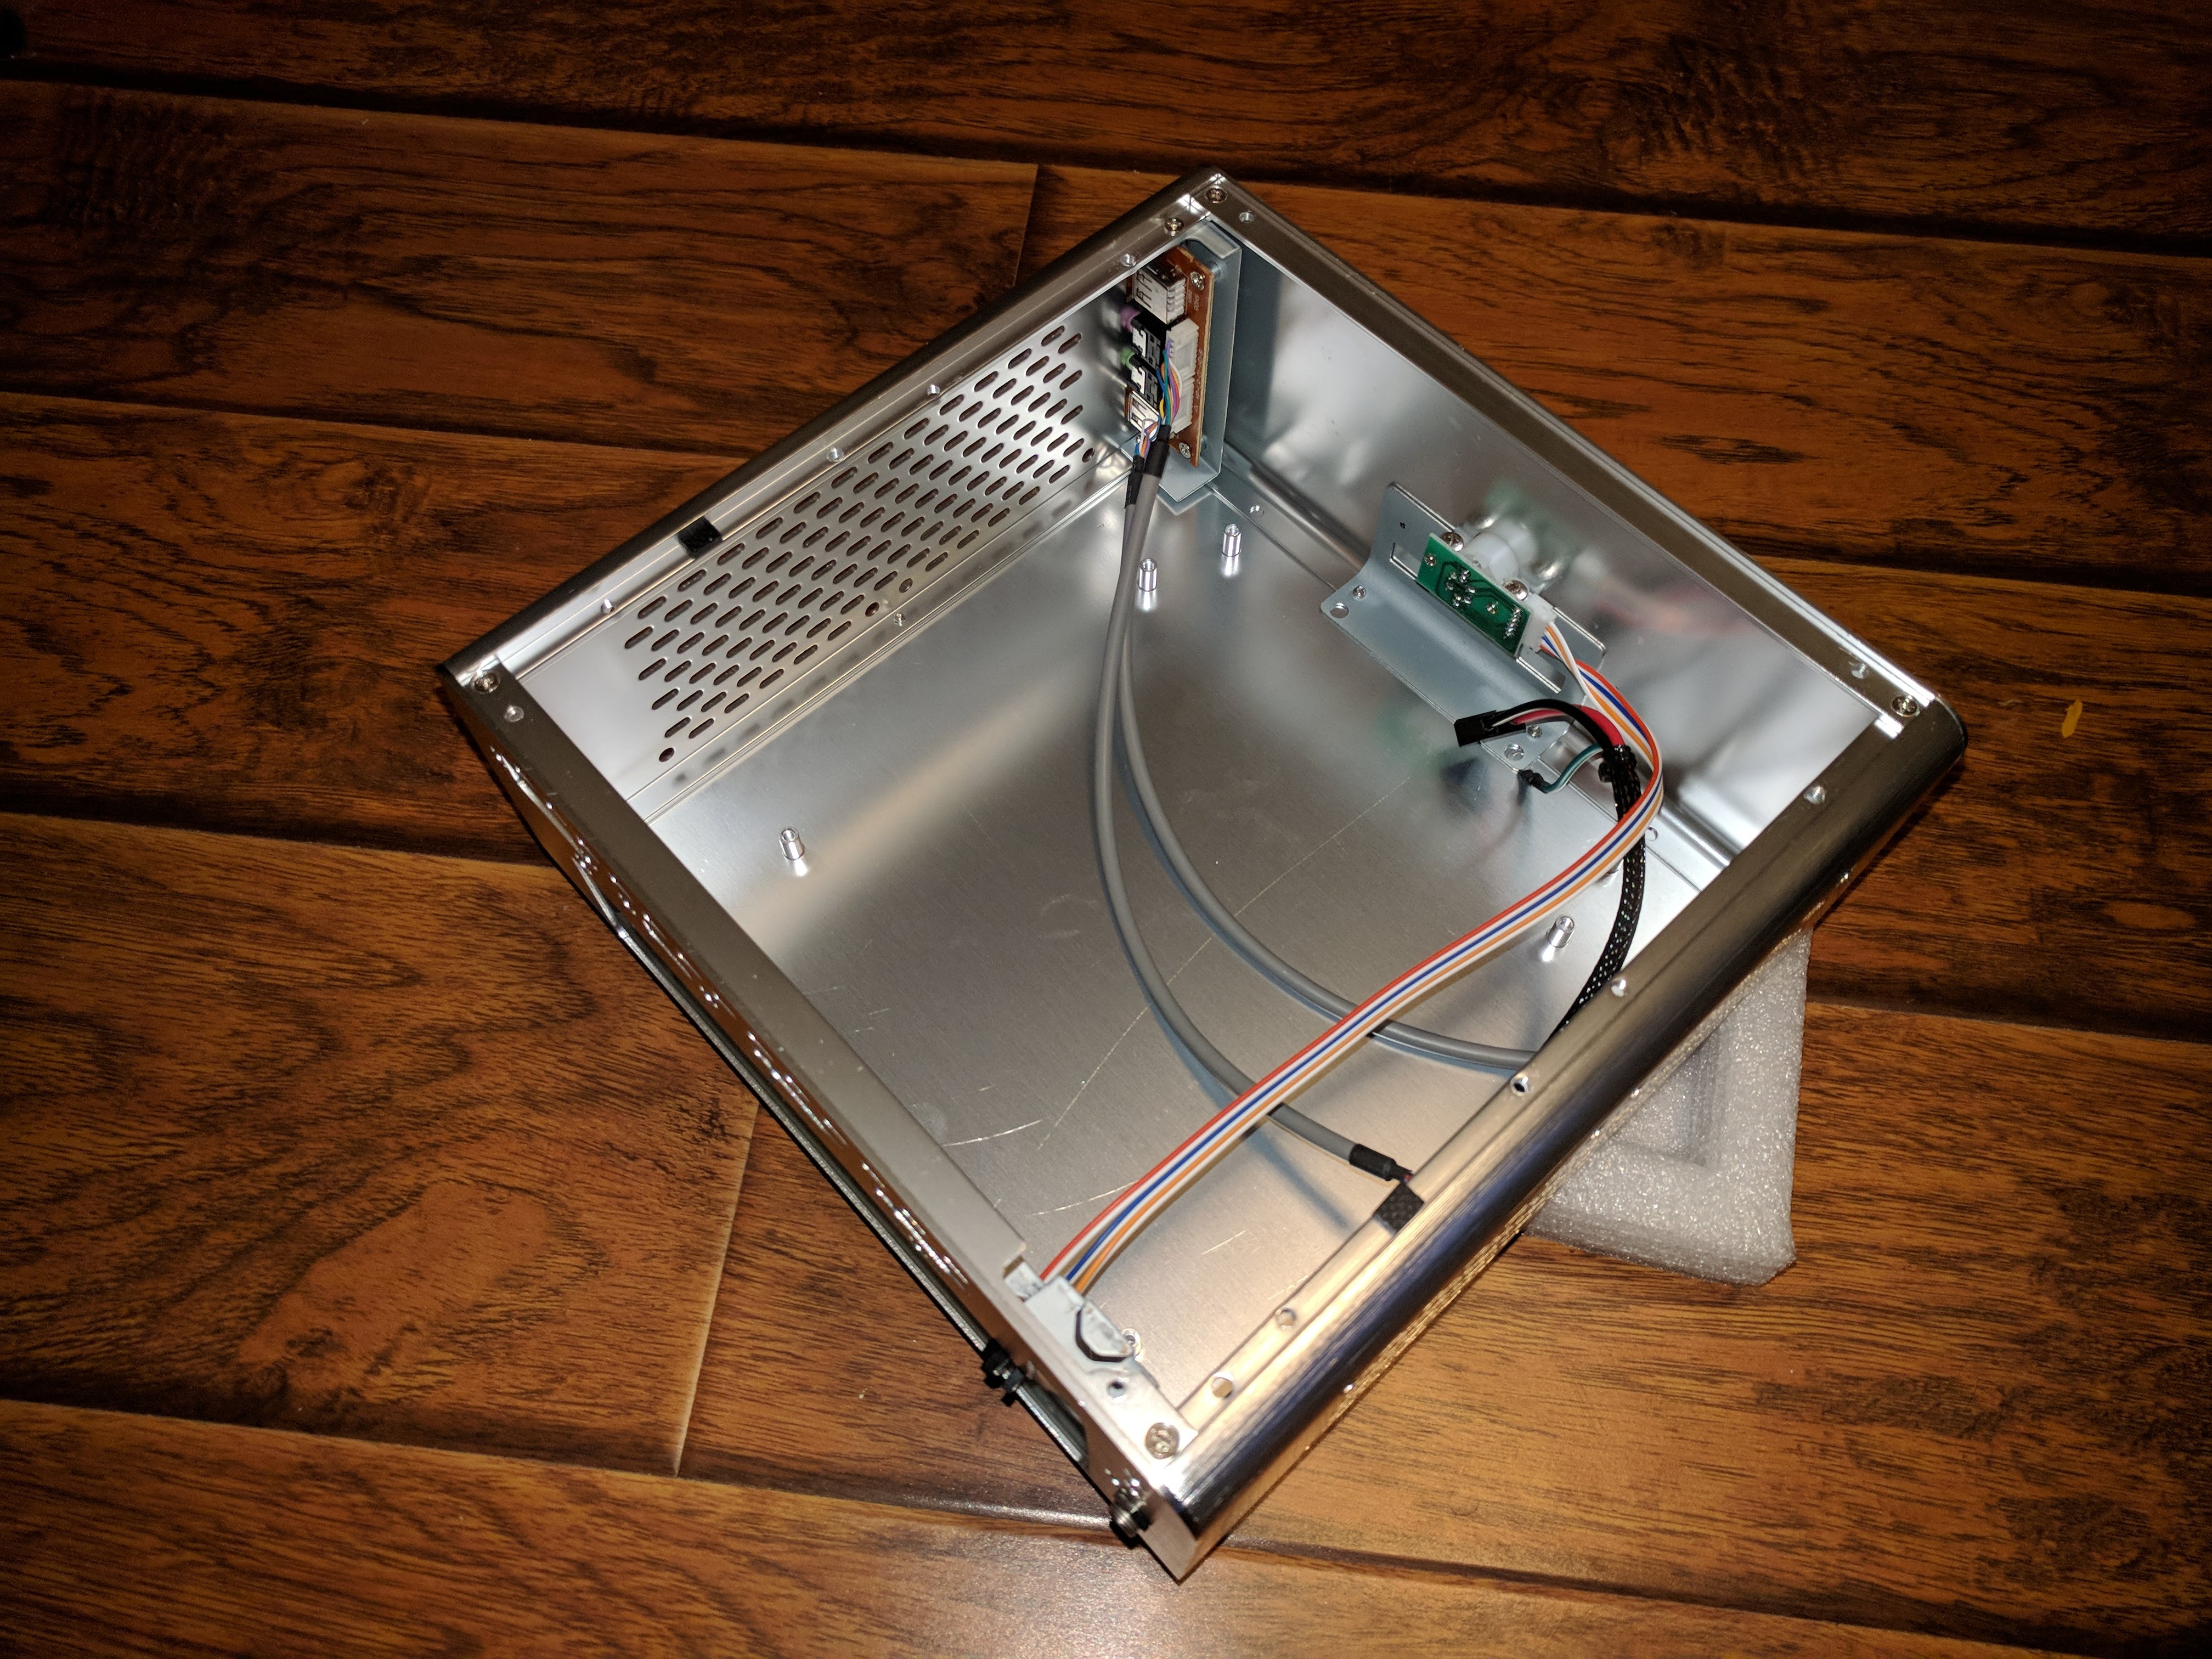
Since the system is held together just by screws, after removing about a dozen of them I was able to extract the USB/audio jack assembly from the case, to make room for the SSD in that corner. — I used industrial-strength double stick tape, and once everything was said and done, the inside of the system looked like this:
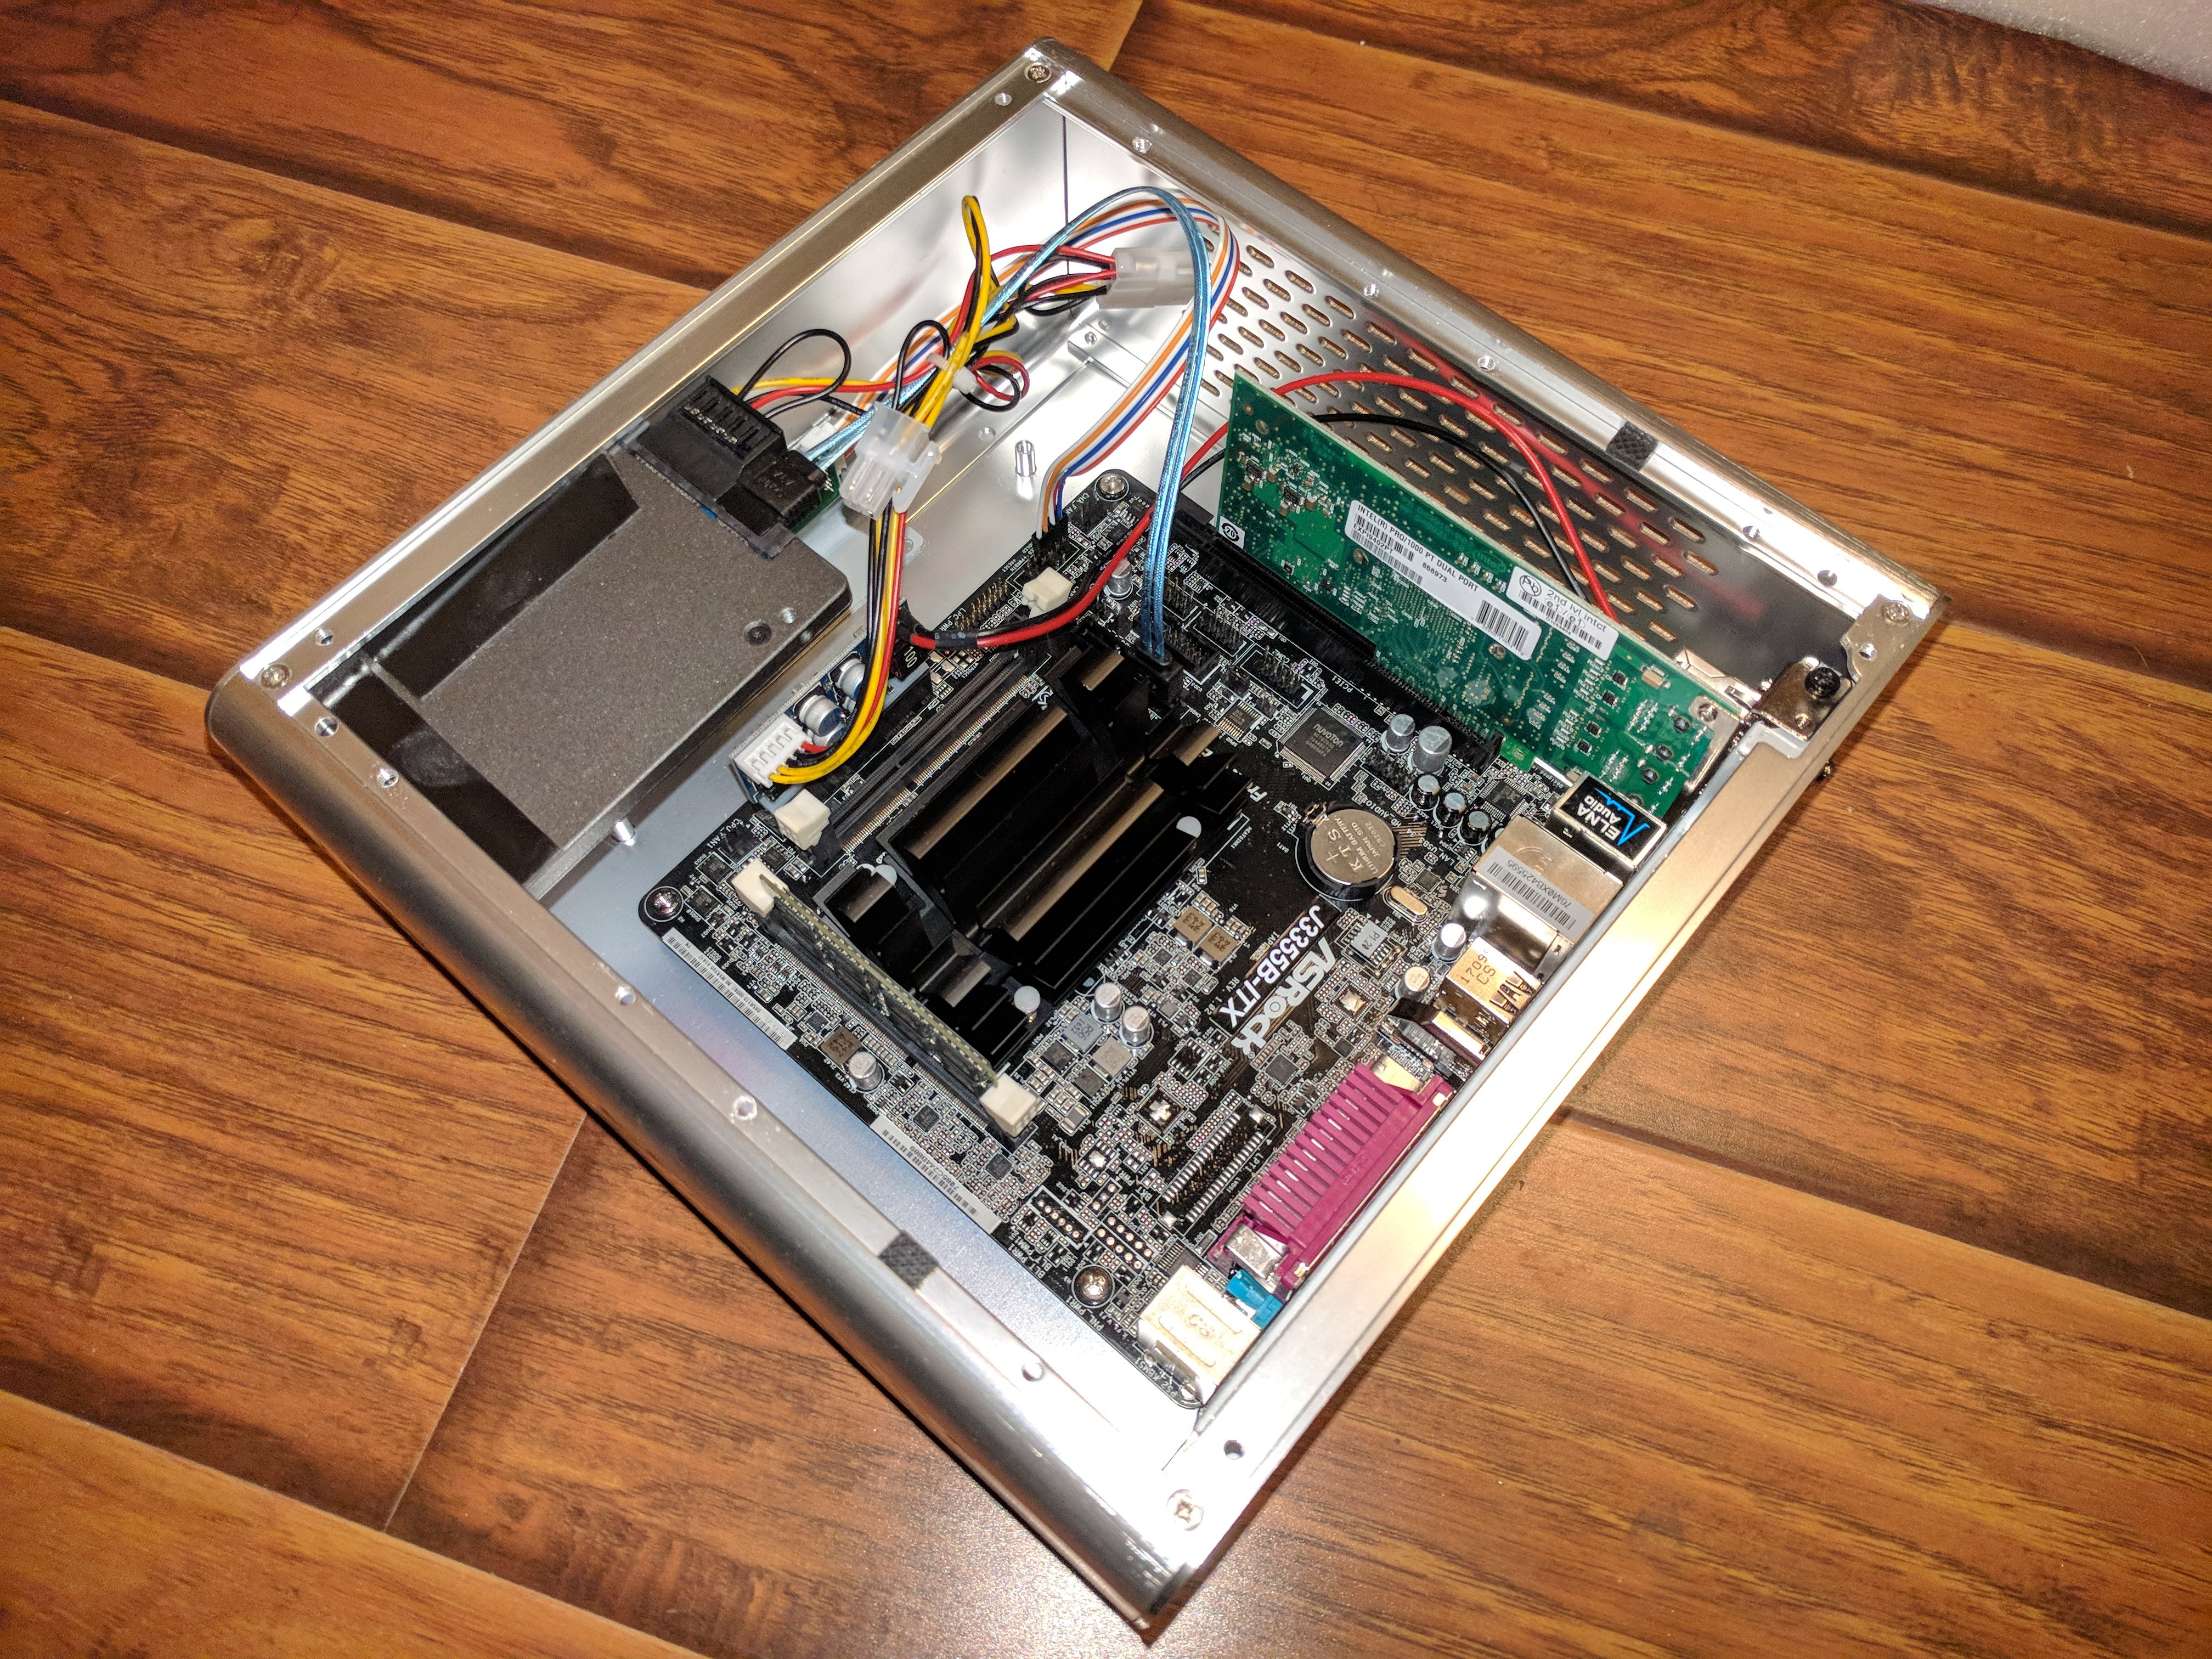
What you cannot see on this picture is the heat sink on top of the network card. — Since the network card actually produces more heat than the CPU, and because the case will be out of sight anyways, I decided to turn the case sideways so that the heat from the network card heat sink can just rise through the slots in the case.
This is what I ended up with after wiring everything up. — I still need to clean up the rat’s nest:
Closing Thoughts
A Neat pfSense Feature
I had initially installed pfSense using UFS, assuming that ZFS would not make much sense for an appliance. But browsing around on various forums convinced me that ZFS was the way to go for robustness/reliability.
When I put the system into the case I took the opportunity to reinstall pfSense from scratch. This was made easy by a really cool feature of the pfSense installer:
During the reinstall, the installer detected that I was about to overwrite an existing pfSense system and offered me to preserve the configuration of that existing installation. — My only complaint about this feature is the UI for it: You can select the partition to pull the config from, but once you select that, there is no confirmation that something has actually happened. Since there is no feedback, you have to take a leap of faith at that point. — But the feature worked without a hitch!
Ubiquiti Config Restoration Issues
Unfortunately the experience with Ubiquiti Unifi’s configuration restore was not as smooth:
I had also installed the Ubiquiti Unifi software on the firewallusing this handy script, to manage my Ubiquiti AC Pro. The script makes the process dead-simple (you have to manually edit it to point to the latest version of the software, tho…).
When I reinstalled pfSense from scratch I had to reinstall the Unifi software as well. I had previously backed up the configuration through the Unifi web UI and was attempting to restore it, but when I tried to upload the configuration throught he web UI again, the Unifi software became unresponsive and eventually my browser reported “connection timed out”.
Since Unifi did not come back even after several minutes I decided to log into my firewall and manually restart Unifi. Luckily, it came back up, and it had even managed to apply the configuration!
However, the euphoria was short-lived, since my access point was now listed as “Disconnected”. Googling the matter did not turn up anything useful. So I decided to try to unplug the ethernet cable from the AC Pro, but that did not resolve the issue either!
As a last-ditch effort I decided to unplug the power from the PoE injector and wait for the power LED to fade out, which took almost a minute. When I plugged the power cable back on, the light on the AC Pro went on and it apparently rebooted and the Unifi software was able to connect to it again.
I presume there are some fairly large capacitors in the AC Pro, such that unplugging the ethernet cable for only about 10 seconds is not long enough to make the AC Pro actually reboot.
While I generally like the Unifi AC Pro, this experience left something to be desired and I hope Ubiquiti will improve configuration restore in the future…
What Is The Bottom Line?
At Or Close To Wire Speed!
After setting everything up and configuring firewall rules, etc, I ran a speed test on my connection, from my ethernet-connected desktop computer behind the firewall:
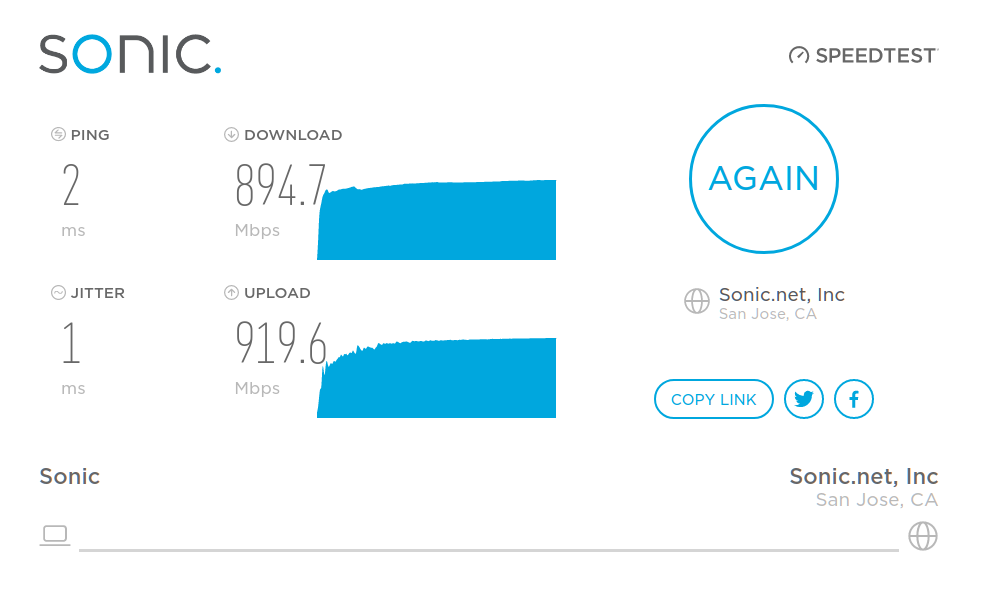
Note that the highest speed I’ve ever seen in a speed test was around 930Mbit/sec, which I presume is pretty close to the theoretical maximum for gigabit fiber taking protocol overhead into account. — I don’t think the link was idle when I ran the test (somebody was streaming live TV), but I am happy with the result regardless and I would say that the goal of building an appliance that can route “at or close to wire speed” was achieved.
UPDATE:
I re-ran the test and captured a screenshot of the pfSense dashboard. As you can see, we can hit saturation on a gigabit link.
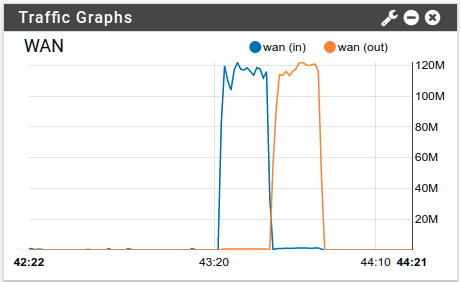
CPU utilization on the firewall tops out between 80% and 90% in the test.
Intangibles
Streaming Live TV Behavior Seems Improved
When we got gigabit fiber we ditched our cable subscription and signed up with a live TV streaming service. We tried DirecTV Now, Hulu with Live TV and Sony Playstation Vue. We stuck with Sony simply because it had the least glitchy streaming performance. PSVue still used to have the occasional glitch, but I don’t recall encountering a glitch since I’ve switched out the firewall/WiFi access point from the Cupertino Fruit Company for my pfSense appliance.
However, we’ve had this setup only for about a week, so it is probably too early to tell.
VoIP Scare
At some point I noticed that any attempt to place a phone call via our Yealink SIP/VoIP office phone failed with “Line Forbidden”. I wasted about an hour troubleshooting and fiddling with firewall settings, but the problem seems to have been that our PBX in the cloud had decided to blacklist our public IP due to “too many failed authentication attempts”. My guess is this might be due to the downtime I caused when putting the pfSense appliance into its case/reinstalling it.
My knowledge of VoIP is fairly limited, but I ended up reprovisioning the phone and briefly connected it directly to the internet, bypassing the firewall. I also whitelisted our public IP on the cloud PBX and one or a combination of all these steps seems to have resolved the problem.
I am keeping a close eye on the phone for now but it has been rock solid since then, for more than 24 hours now.
What’s Next?
I should probably also talk about the perils of setting up a Dell PowerConnect switch, and how disappointingly little thought some vendors of IoT devices put into the workflow for updating WiFi credentials…
And then there are still wires to run through walls…